These are some tips to cook bacon in a convection cooker: Use parchment paper, or a rimmed baking pan. This will prevent grease or drippings from catching fire and spreading in your oven. The bacon should not splatter at 350 degrees Fahrenheit. However, it will still be covered in grease that can splash all over the stovetop and sink. This can be prevented by not turning the bacon over too often and not cooking it directly from the fridge.
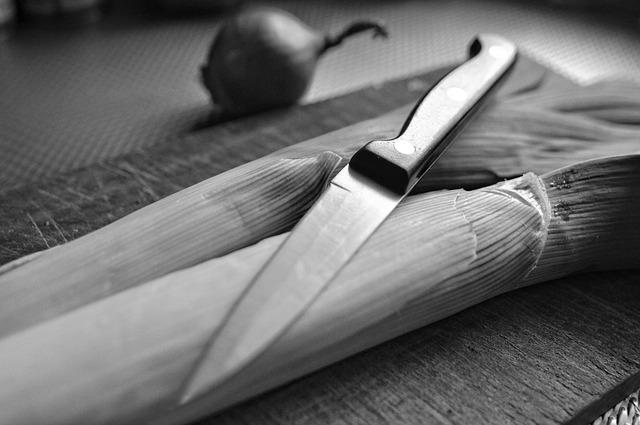
Bacon in a convection cooker
A convection oven is the easiest way to cook bacon. Convection cooking distributes heat evenly so bacon is crispy, even, and juicy. If you don't want to invest in a convection oven, you can opt for an air fryer, which works in a similar way. Line a baking sheet with parchment paper, and then place the strips of bacon in the oven. The first 10 minutes of cooking will be enough to cook the bacon. Once the bacon is done, you can flip them and continue cooking it in the oven for an additional five to seven minutes.
It's important to check the bacon regularly during cooking. It can be turned after 10 minute, which will ensure that bacon is not burned. It will vary depending on how thick the pieces are and the temperature of your oven. A convection oven should cook two sheets bacon in 20 minutes. To be safe, you can use a conventional oven. However, make sure to check them after 10 minutes to ensure they are golden and crispy.
Once flipping bacon
There are a few things to keep in mind when cooking bacon. Bacon, unlike other foods, does not need be turned frequently. The best rule of thumb is to flip it once every ten or twenty minutes. Be sure to watch your pan as every appliance has a different cooking time. After it has been cooked, transfer it to paper towels to absorb grease. It can be served with fried eggs, flapjacks, or other savory accompaniments.

Bacon can also baked. Baking bacon doesn't require turning and it saves time because you don't have to clean the pan. If you plan on cooking a large batch of bacon, you can also line your baking sheet with parchment paper or aluminum foil. Baking the bacon in batches makes cleanup easier. And you can even use the bacon fat. You can also use the fat from the bacon to make soup.
Don't cook bacon from the fridge!
You can get food poisoning from cooking bacon. This can lead to serious consequences. Raw meats can carry bacteria, viruses, or parasites. Every year, about 48 million people are sick due to food contamination. Rotten meat is the leading cause of illness, especially for young children and those over 65. Bacon should first be cooked to the desired crispiness, then stored in the fridge or freezer.
You should not add bacon right out of the fridge. This can lead to the fat burning and rendering. This will ensure that you don't end up with a stinky bacon mess when cooking. You should also avoid cooking bacon right out of the fridge as it can cause it to go soggy. It can cause bacon curls, which is not healthy.
Storing bacon drippings
There are many options when it comes to how to store bacon drippings. It is best to keep the grease in an airtight glass jar. Mason jars work great for this purpose. Make sure the sealant cover is clean so that it doesn't get clogged with grease and other debris. Bacon grease is good for around a year, before the flavor starts to fade. The grease can be used to make other dishes in the future.

After cooking, strain the grease by using a cheesecloth. You should keep in mind that grease can get wet if stored in temperatures that fluctuate. Make sure that the jar is completely cool and airtight to prevent moisture from forming. Once the grease cools, you can store it in an airtight container. Use ceramic or glass containers to avoid unpleasant odors. The grease will become milky-white once it has cooled completely.
FAQ
What are the advantages of using a slow cooker to cook?
Slow cookers are extremely useful as they make it easy to cook delicious meals in a short time. Slow cooker recipes are more healthy than traditional dishes because they use less oil. In addition, slow cooker recipes are convenient because they take care of themselves while you sleep.
How long does it take for you to learn to cook? How long do I need to learn to cook?
It all depends on what level of skill you have. Some people can learn basic cooking techniques in as little as a week. Others may take months or years to master the basics of cooking.
The person who is learning to cook can vary in the amount of time they need. An example: Someone who has never cooked before may need more time than someone who makes regular meals. You may also need more experience with certain types of cooking than others. Baking, for instance, requires more skill than frying.
A specific technique will help you cook faster. You can then move on to the next technique once you have mastered it. Don't worry too much about the exact number of days or weeks it takes to learn to cook. Keep practicing and enjoying the process.
Can you learn to cook on your own?
You can learn to cook by yourself! Everyone loves cooking, regardless of whether they are skilled or not. You can learn to cook by starting at home. Start small with simple things like spaghetti sauce or pancakes for breakfast. Try new recipes and be open to experimentation when learning how to cook. It's possible that you will make mistakes.
Cooking can take anywhere from a few hours to several months depending on the skill level. Remember that cooking is not about following recipes. There are many ways to cook food. If you have an idea, follow it.
Statistics
- On average, chefs earn $58,740 a year, according to the BLS. - learnhowtobecome.org
- You'll be amazed that over 90% of CIA students receive scholarships and grants to finish their culinary studies. (ischoolconnect.com)
- The median pay for a chef or head cook is $53,380 per year or $25.66/hour, according to the U.S. Bureau of Labor Statistics (BLS). (learnhowtobecome.org)
External Links
How To
How to make a perfect eggroll
Omelets is one of my favourite breakfast foods. But how do you make them perfectly? I've tried many different methods and recipes, but none of them seem to work! I have some tips and tricks to help you make delicious, fluffy omelets every single morning.
We should first know that eggs are very temperamental ingredients when making omelets. They must be fresh, preferably from the organic market, and be kept cold until cooking. The yolks and whites will not form properly if they aren't kept cold enough. Your omelets will look strangely colored if this happens. If you're going to cook them immediately, it is best if the eggs are still warm.
Another tip is to separate each egg before adding them to the saucepan. It is important not to allow any white to mix with the yolk as this could lead to the omelet becoming curdled.
The bottom part of an egg that is added directly to the stovetop might be burned, which could cause a ruined texture in your omelet. Instead, put the egg in the microwave for 10 seconds before putting it into the pan. The microwave heat cooks your egg just right, without it becoming too soft.
Next, let's discuss mixing the eggs. When you mix eggs together, you want to beat them well. You need to turn the bowl of the mixer upside down. Now shake the bowl vigorously. This will whip the air around the bowl and mix the egg well.
The fun part is now - adding the milk to the mixture. First, pour half of the milk into the beaten eggs and then fold the eggs gently into the remaining milk. You don't need to worry if streaks remain. They will disappear once you flip your omelet.
After you have done folding the eggs, heat the pan on medium heat. The oil will start to smoke. Once the oil begins to heat, add 1/4 cup butter and swirl the pan to coat it. Now carefully crack open the lid of the pan and sprinkle salt into the pan. An additional pinch of salt will prevent the omelet form sticking to your pan.
Once the omelet has formed, cover the pan again and wait for the top side to set completely. Flip the omelet over using a spatula or flip the pan upside down. Cook the other side for another minute or two. Take out the omelet and place it in a bowl.
This recipe works best with whole milk, but skimmed milk also works.